This will show you how to set-up preferences to automatically receive RFQs into PrintPoint, and how to handle them
1. File Menu > Preferences > Telecommunications > RFQ Settings
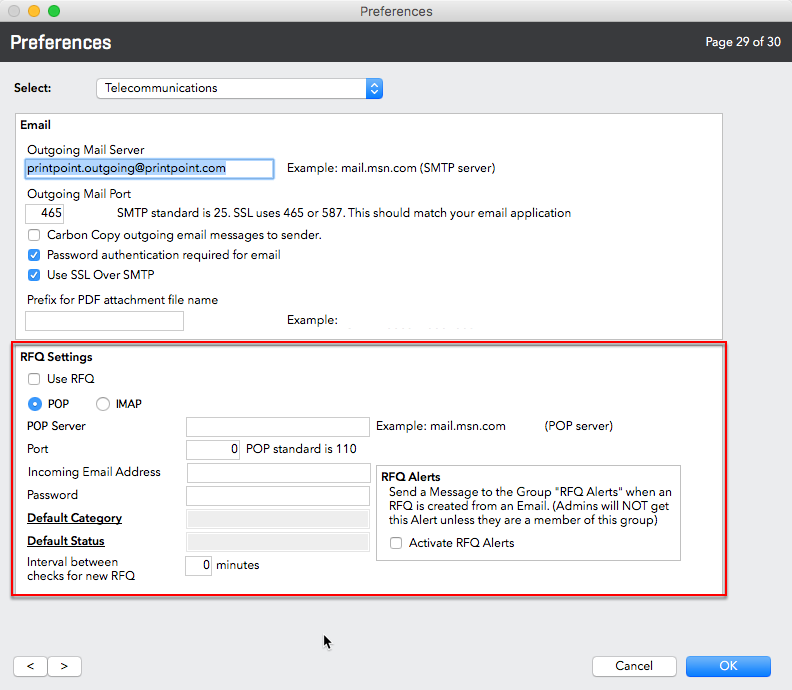
2. Turn on Use RFQ

3. Select Pop or IMAP mail account Type

4. Set your IMAP Server

You may need to adjust the Port - (IMAP standard is 143)
5. Incoming Email Address & Password

This is the Email address to which RFQs will be sent:
A) From your Web Site
B) By your customers directly
C) Forwarded to from your email after customers have sent in email requests to your standard email application.
3. New RFQ Defaults

Default Category:
Default Status:
4. How often PrintPoint should check for new RFQs and who should be informed

(1) This tells PrintPoint how often to check for incoming RFQs.
(2) Assign users to the group "RFQ Alerts" using the next article. You MUST do those steps to see notifications of new RFQs. For more information on users & groups refer to User & Groups.