How to install Windows Client
Print
Modified on: Wed, May 21, 2025 at 11:06 AM
1. Download the Windows client installer here.
2. Find the installer and run it, following all setup steps:

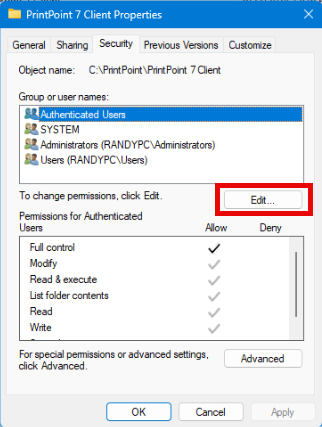
3. Navigate to the C:\PrintPoint folder, right-click on the PrintPoint 7 Client folder, and select the Properties menu item at the bottom.

4. In the Properties dialog, click on the Edit... button below the users and groups.
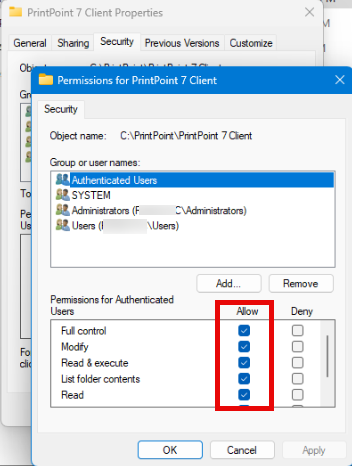
5. Here in the Permissions dialog, select each user/group in the top list to confirm that the permissions for that user or group are set to Full Control under the Allow column in the lower list. When all users and groups are confirmed, click the OK button to return to the main properties and click the OK button there as well.
6. Locate the Printpoint Client.exe file in the PrintPoint 7 Client install folder and pin it to the taskbar.

7. Hold down the Alt key when clicking on the taskbar icon for PrintPoint 7 Client. This will force the Connection to Server dialog to appear. In this dialog, enter in your Project Name (value doesn't matter - we generally use PP7 for convenience) and then the Network Address in the Custom tab. The network address should be "{YourServerIPAddress}:21813"
You should get your server's IP address from someone at your location. This could be an IT person or someone similar who has access to the server machine itself.
When ready, click the OK button to try connecting to the server.

8. If successful, you'll see a set of thermometers showing progress with synchronizing local cache files from the server. After syncing, PrintPoint will initialize and you can login using a pre-created user account or an Administrator account.

If not successful, check with the IT person from whom you got the Network Address to verify that the address is correct and the firewall on the server has inbound and outbound rules enabled to allow the PrintPoint Server access. If other clients are already connected, the issue is likely just a mis-type on the Network Address in the step above or the firewall on the client machine needs to allow the PrintPoint 7 Client application to have access to the network.
Did you find it helpful?
Yes
No
Send feedback Sorry we couldn't be helpful. Help us improve this article with your feedback.